Share This

Pages on this site may contain affiliate links, meaning if you book or buy something, I may earn an affiliate commission at no additional cost to you. Thank you for your support! Learn More
Also note: While I am a certified nutrition coach, I am not a medical doctor. Information here is not intended to be a replacement for the advice you should seek from your doctor.
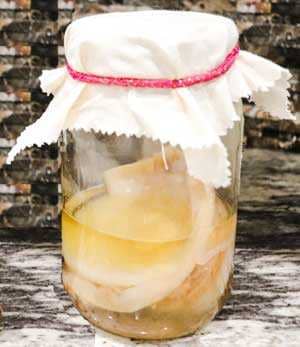
So, if you’ve come to this text about kombucha’s second fermentation, I guess your emerging kombucha is in some nice, dark, and warm corner, or maybe it’s already done and waiting for all those interesting and fun flavor combinations we’ll explore in this text.
If not, you can always go back to my previous text where you can read about the process of making your first fermentation of kombucha.
Second fermentation (F2) is a process in which we add flavors and carbonation to our beverage, and usually lasts 2-4 days or longer. The longer you do your 2F, the more carbonated and less sweet it will become. At the beginning of this last phase, let’s go through some “technical tips” that will help you make your kombucha taste great.
Arm yourself with imagination and off we go!
You have little control over the brewing process and cost when you buy it from the store. Try brewing it at home instead!
Best Bottles for Kombucha
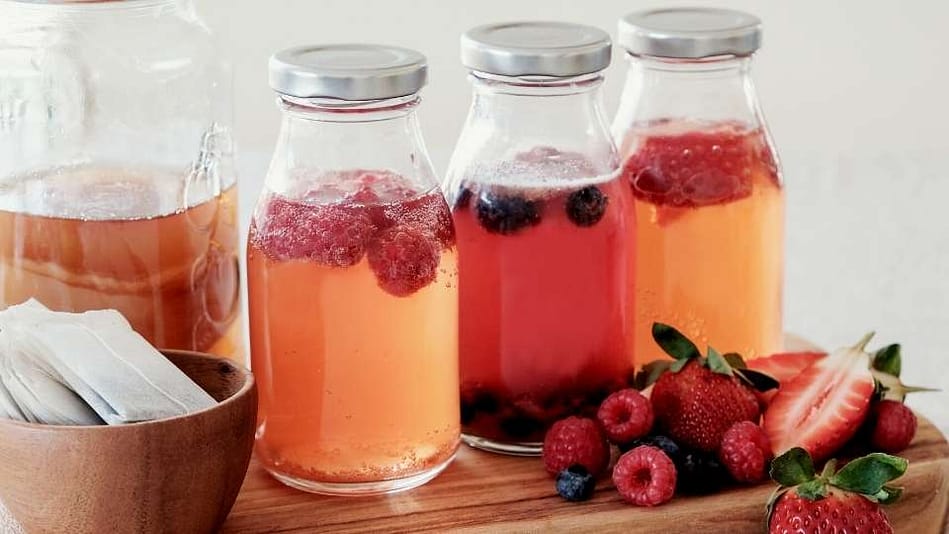
It is very important the bottles we choose to use in the F2 process. They need to be made of quality glass, which will be able to withstand carbonization. We don’t want our bottles to explode! It is also important that these are airtight bottles, to keep the bubbles inside. A pretty good solution is 16 oz. flip-top bottles, but be sure that the glass is thick enough. The easiest solution is to find bottles specifically for brewing kombucha or beer.
Here you can see an example of good bottles.
What can I use for flavoring kombucha?
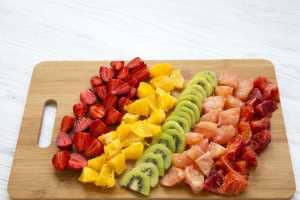
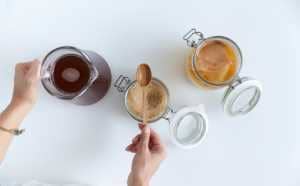
What is needed for kombucha to become fizzy is sugar. It does not have to (but can) be only in the form of plain sugar, but we can add it through chopped fruit, fruit puree, fruit juice, dried fruit, fresh or dried herbs, jams, more tea, essential oil, extracts, etc.
The fungi feed on sugar and thus produce carbon dioxide which remains trapped in the liquid (if in an airtight bottle). That way we get those irresistible bubbles. The more sugar, the more bubbles! It is something that you will adjust to your taste over time.
I like to use fruit the most because it is definitely the healthiest option. And here we come to the question of how much flavoring should you add? That is also something you will explore and adapt to yourself. Until you get to the answers yourself, my recommendation is approximately 1/3 cup per 16oz. bottle. Of course, it all depends on the type and sweetness of the fruit you use. Feel free to experiment!
If you want unflavored kombucha, it is ready for consumption after the first fermentation. If you still want it to be carbonated but without added flavors, it is enough to transfer your kombucha to airtight bottles after F1 and add 1tsp of plain sugar. Leave it at room temperature and dark place for 2-4 days.
How to Flavor Kombucha – Second Fermentation Instructions
Time needed: 3 days
Kombucha Second Fermentation Instructions
- Place chopped fruit or puree in bottles.
Put in 16 oz. bottle up to 1/3 cup of chopped fruit or fruit puree.

- Remove SCOBY and place in another jar with 2 cups kombucha
Take the scoby out of the jar with the kombucha (with clean hands), and place it in another jar along with 2 cups of the kombucha liquid. Save this for the next batch. Then gently stir your kombucha. This is a very important step, because by mixing you distribute the fungi evenly in the liquid.

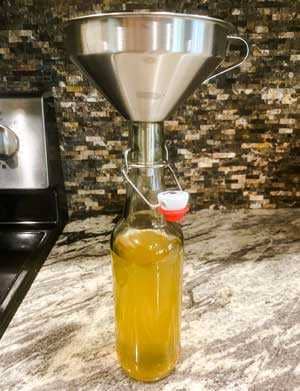
- Put kombucha in bottles
Then pour the kombucha into the airtight bottles with fruit, using a pitcher or funnel. Remember to leave some space at the top of the bottle (1 inch). Tighten well!

- Leave in room temp for 2-4 days
Leave the bottles in a dark place at room temperature for another 2-4 days. If you want your kombucha not to be too fizzy, you can occasionally loosen the cap a little to get the carbonation out, and then tighten it again. After those few days, transfer the bottles to the refrigerator to stop the fermentation process. If it’s not fizzy enough, you can always get your kombucha back to room temperature for another day or two.

❤️❤️ Don’t miss a recipe or post! Make sure you remember to sign up for my Newsletter and follow me on social ❤️❤️!
Get Your Free Stuff!


Kombucha Flavor Ideas
This is where your imagination comes into play. You can make kombucha with just one or several flavors, combine fruit puree and juice, add spices or extracts… Combinations are limitless! I will introduce you here to some of my favorite flavored kombucha recipes. These are all ingredients per 16oz bottle of kombucha.
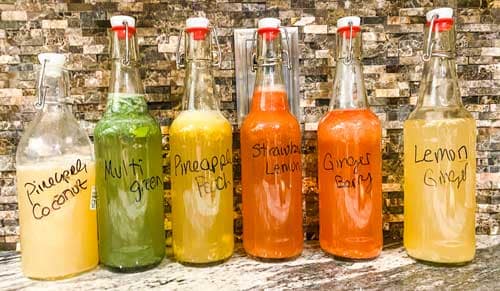
Lemon Ginger Kombucha Recipe
- 1/4 cup ginger beer
- 1 tbsp lemon juice
Ginger Berry Kombucha Recipe
- 2 tbsp ginger beer
- 3 tbsp berry juice – can be cranberry raspberry or some other semi-tart variation
Pineapple Peach Kombucha Recipe
- 2 tbsp pineapple juice
- 1/2 cup pureed peach (preferably sifted)
Raspberry Lemon Kombucha Recipe
- 1/4 cup pureed raspberries (preferably sifted)
- 2 tbsp lemon juice
Strawberry Lemon Kombucha Recipe
- 1/2 cup pureed strawberries (preferably sifted)
- 2 tbsp lemon juice
Notes
- Avoid square bottles which can explode easier
- Always use fresh fruit puree or juice. Fruit puree is a good choice because fungi get fruit sugar more easily than is the case with fruit pieces.
- Dry your caps and bottle tops before sealing.
- Do not open your bottles before they have cooled in the fridge, as this could lead to a mess in the kitchen! Always open them over the sink and with a cloth in hand.