If you have read my previous two texts about kombucha, Benefits of Kombucha, and How Kombucha Can Benefit Health Issues, you learned how beneficial kombucha can be for your body. In this post, we will go through the first part of the kombucha home-making process. By making it at home, we can be sure that it is prepared the right way and that it contains all the right ingredients. It may seem new and complicated at first, but don’t be discouraged! It’s very simple, and we’re here to help if you get stuck at some point. All your questions, photos, and experiences are more than welcome in the comments at the end of the page. Good luck!
What Do I Need to Make Kombucha?
So, you probably wondering now what is that what you need to get started. In my shop, you can find the Kombucha Brewing Kit, which will save you a lot of money in the future, and which includes everything you need:
- One Gallon Brew Jar with Plastic Lid
- Organic Kombucha Culture & 1 Cup Liquid Starter
- Organic Cane Sugar
- Organic Loose Leaf Black & Oolong Tea
- Reusable Cotton Tea Bag
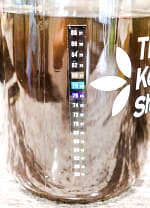
- Temperature Gauge
- Cotton Cover & Rubber Band
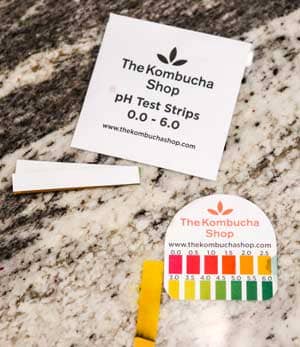
- Ph Test Strips
- Pipette
- Wet Erase Marker
- Step-by-Step Brewing Instructions
- Post-Brewing Guide
You have little control over the brewing process and cost when you buy it from the store. Try brewing it at home instead!
Let’s Get Started
How to Brew Kombucha
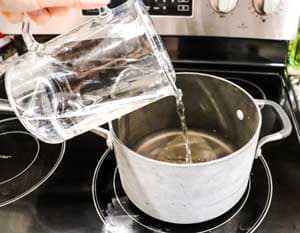
- Boil water
Heat 4 cups of water to boiling in a medium-sized pot, and then turn off the stove and remove it from the heat source.

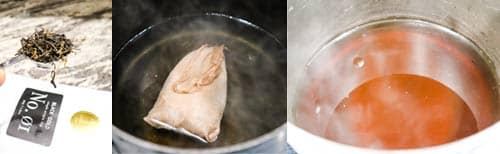
- Let tea steep
Then add the tea (loose tea will need to be bagged, something that comes in the kit) and leave for 5-7 minutes, or until the water takes on a dark color.

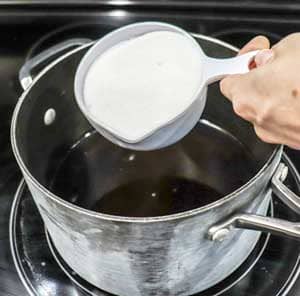
- Add sugar
Add a cup of preferably raw organic sugar and stir until sugar has dissolved.

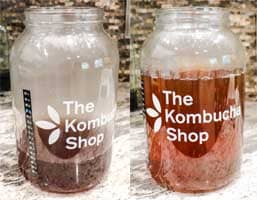
- Dilute with water
Fill your gallon brew jar with 8 cups of cold and filtered water along with the tea. Gently mix.

- Let cool
Wait at least 1-2 hours for the tea to cool to room temperature or to a temperature reading of 68 – 86 degrees Fahrenheit. Be sure to be patient in this step, because you do not want to kill all the beneficial bacteria and yeast. The kombucha culture (AKA SCOBY-symbiotic culture of bacteria and yeast) doesn’t like high temperatures.

- Add liquid starter
When the sweet tea has cooled, you can add a liquid starter. A liquid starter is typically a cup of the leftover kombucha from the last batch that you store your SCOBY in. You can also get this from a friend or from a bottle of raw kombucha from the store. 😄 The kombucha kit in my store, comes with the SCOBY and starter combined. Transfer all this to the jar, along with the SCOBY.

- Check pH
Test the pH level of the tea to ensure the tea is at an acidity of 4.5 or below. You may do this using pH test strips (also available in the kit) or on amazon. An acidic tea ensures pathogens (“bad” bacteria) won’t grow in your kombucha brew.

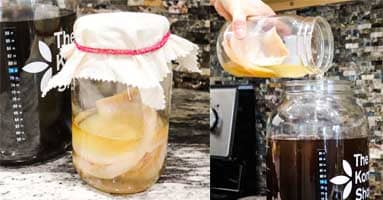
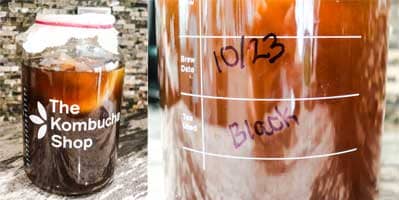
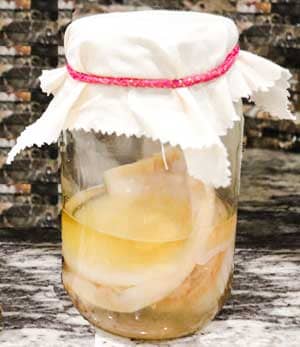
- Cover and wait
Then cover the jar with a cotton cover or cheesecloth (basically anything that lets the kombucha ventilate a bit but keeps anything foreign out) and tighten with a rubber band. Place the jar in a quiet place out of direct sunlight, where it will remain undisturbed, with a room temperature of about 21-24C (70-75F) for at least 6-10 days.

- Start tasting!
After the 6th day, you can start tasting it. When it reaches sweetness and tartness to your taste, the drink is ready for the next step.

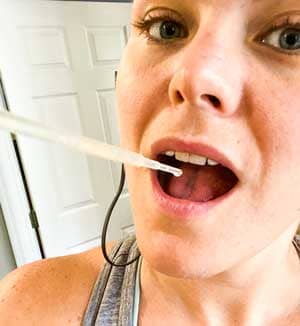
- Test pH again
Test the pH of the kombucha once again to ensure it’s between 2.5-3.5. If it is not, you risk drinking kombucha that had an environment pathogens can grow!
- Save starter and SCOBY
Take two cups of this batch, to use as a starter for the next one, and transfer it together with the SCOBY to another, clean jar. Cover with the same material you used to cover your brew and seal with a rubber band.
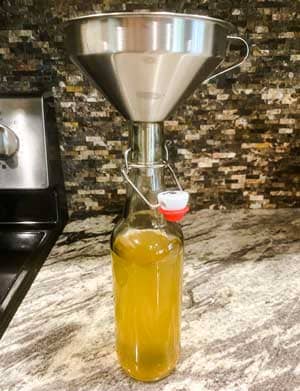
- Transfer kombucha
You can then transfer the drink to the bottle but always leave about 1/3 of the bottle empty. It is MUCH easier to use a funnel. I like this funnel here! These are also excellent bottles for brewing.

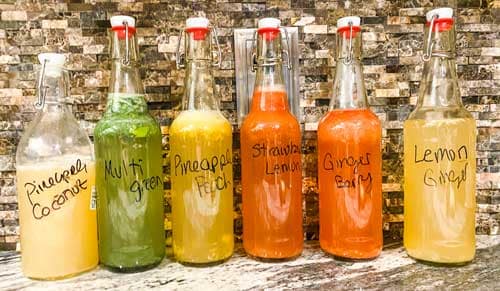
- Post initial brew
After this first fermentation, it is time for the second fermentation, which is in fact the addition of flavor and carbonization. This part is fun! We will deal with this topic in my next post, so stay with me!

How to Make Kombucha Video
Notes
In the Brewing Kit available on my site, there is Black and Oolong tea, but if you like you can try some other types like green, white, fruit, or some mix. If you use fruit or herbal, still mix it with black, so that SCOBY gets what he needs. Avoid tea that contains oils, such as Grey or flavored tea. My advice is to always use natural, organic, good-quality tea.
The warmer the temperature, the sooner the drink will be ready. The longer the tea is fermented (I let mine ferment up to one month), the more sugar will be eaten by the SCOBY and the less sweet it will be. However, it’s worth mentioning that the longer you brew, the more it tastes like vinegar!
When the SCOBY becomes 2.5 inches thick, you may separate a couple of layers to save as a second SCOBY you can give to your friends!
FAQ
There needs to be some form of sweetener (not artificial) to make kombuchas, such as agave, honey, or maple syrup. The reason for this is that the SCOBY needs to feed on sugar in order to ferment. You can always brew the kombucha longer so that most of the sugar is eaten by the SCOBY. I have not yet brewed kombucha with an alternative, so I can not vouch for its taste! (1)
Well, it is possible, but not recommended. If you do not add starter tea to your sweet tea, it could take a long time to acidify your brew. And if it takes a long time, there is a possibility mold will appear in the meantime, which obviously is not sanitary or tasty! If you must, buy a raw kombucha from the grocery store and use a cup of it for your starter tea.
The Starter Kit that is available at my shop includes an appropriate jar. If you still want to get it yourself, a 3.7l (1 gallon) glass jar will do the job.
You can use water from the tap only if it is filtered (through a charcoal filter to remove chlorine and chloramines) or boiled. Bottled water is also fine, but only if it is real spring water. Don’t use distilled water, due to the lack of minerals in it. Kombucha is made of 95% of water, and that is why it is very important what kind of water we use.
Kombucha usually has no more than 1% alcohol if brewed and stored properly. This amount of alcohol will not make you drunk. The amount of alcohol depends on the length of the brew. Longer brews yield kombucha with more alcohol. Once you are done with a brew, be sure to refrigerate it to stop the fermentation process. It could continue to ferment if it is not refrigerated, thus increasing alcohol content (4)
Checking the pH for an accurate reading of acidity is a good way to ensure other pathogens do not grow in your tea. If the kombucha starts to smell cheesy or unpleasant in any way, this is a good indicator that pathogens invaded your brew. You will then need to discard your brew, and start over again with new tea. If there is mold on the SCOBY, both will need to be discarded, and you will need a new SCOBY as well.
A SCOBY can last a very long time, but it will expire. If the SCOBY turns black or otherwise has many dark spots, that is a sign that it’s time to get a new SCOBY. If it develops green or black mold, it has been invaded by pathogens. Either way, you must throw away the SCOBY and start over. (3)
1.Liveeatlearn.com – https://www.liveeatlearn.com/the-simple-guide-to-kickass-kombucha/
2.culinarynutrition.com – https://www.culinarynutrition.com/how-to-brew-and-flavour-kombucha/
3.thekitchn.com – https://www.thekitchn.com/how-to-make-kombucha-tea-at-home-cooking-lessons-from-the-kitchn-173858
4.paleoleap.com – https://paleoleap.com/all-about-kombucha/